 Vanta Panel
DNS Automation (Cloudflare)
Create a new account's Cloudflare DNS records automatically: web and mail records, SPF, DKIM and DMARC, the API token it needs, and how to re-provision an existing domain safely.
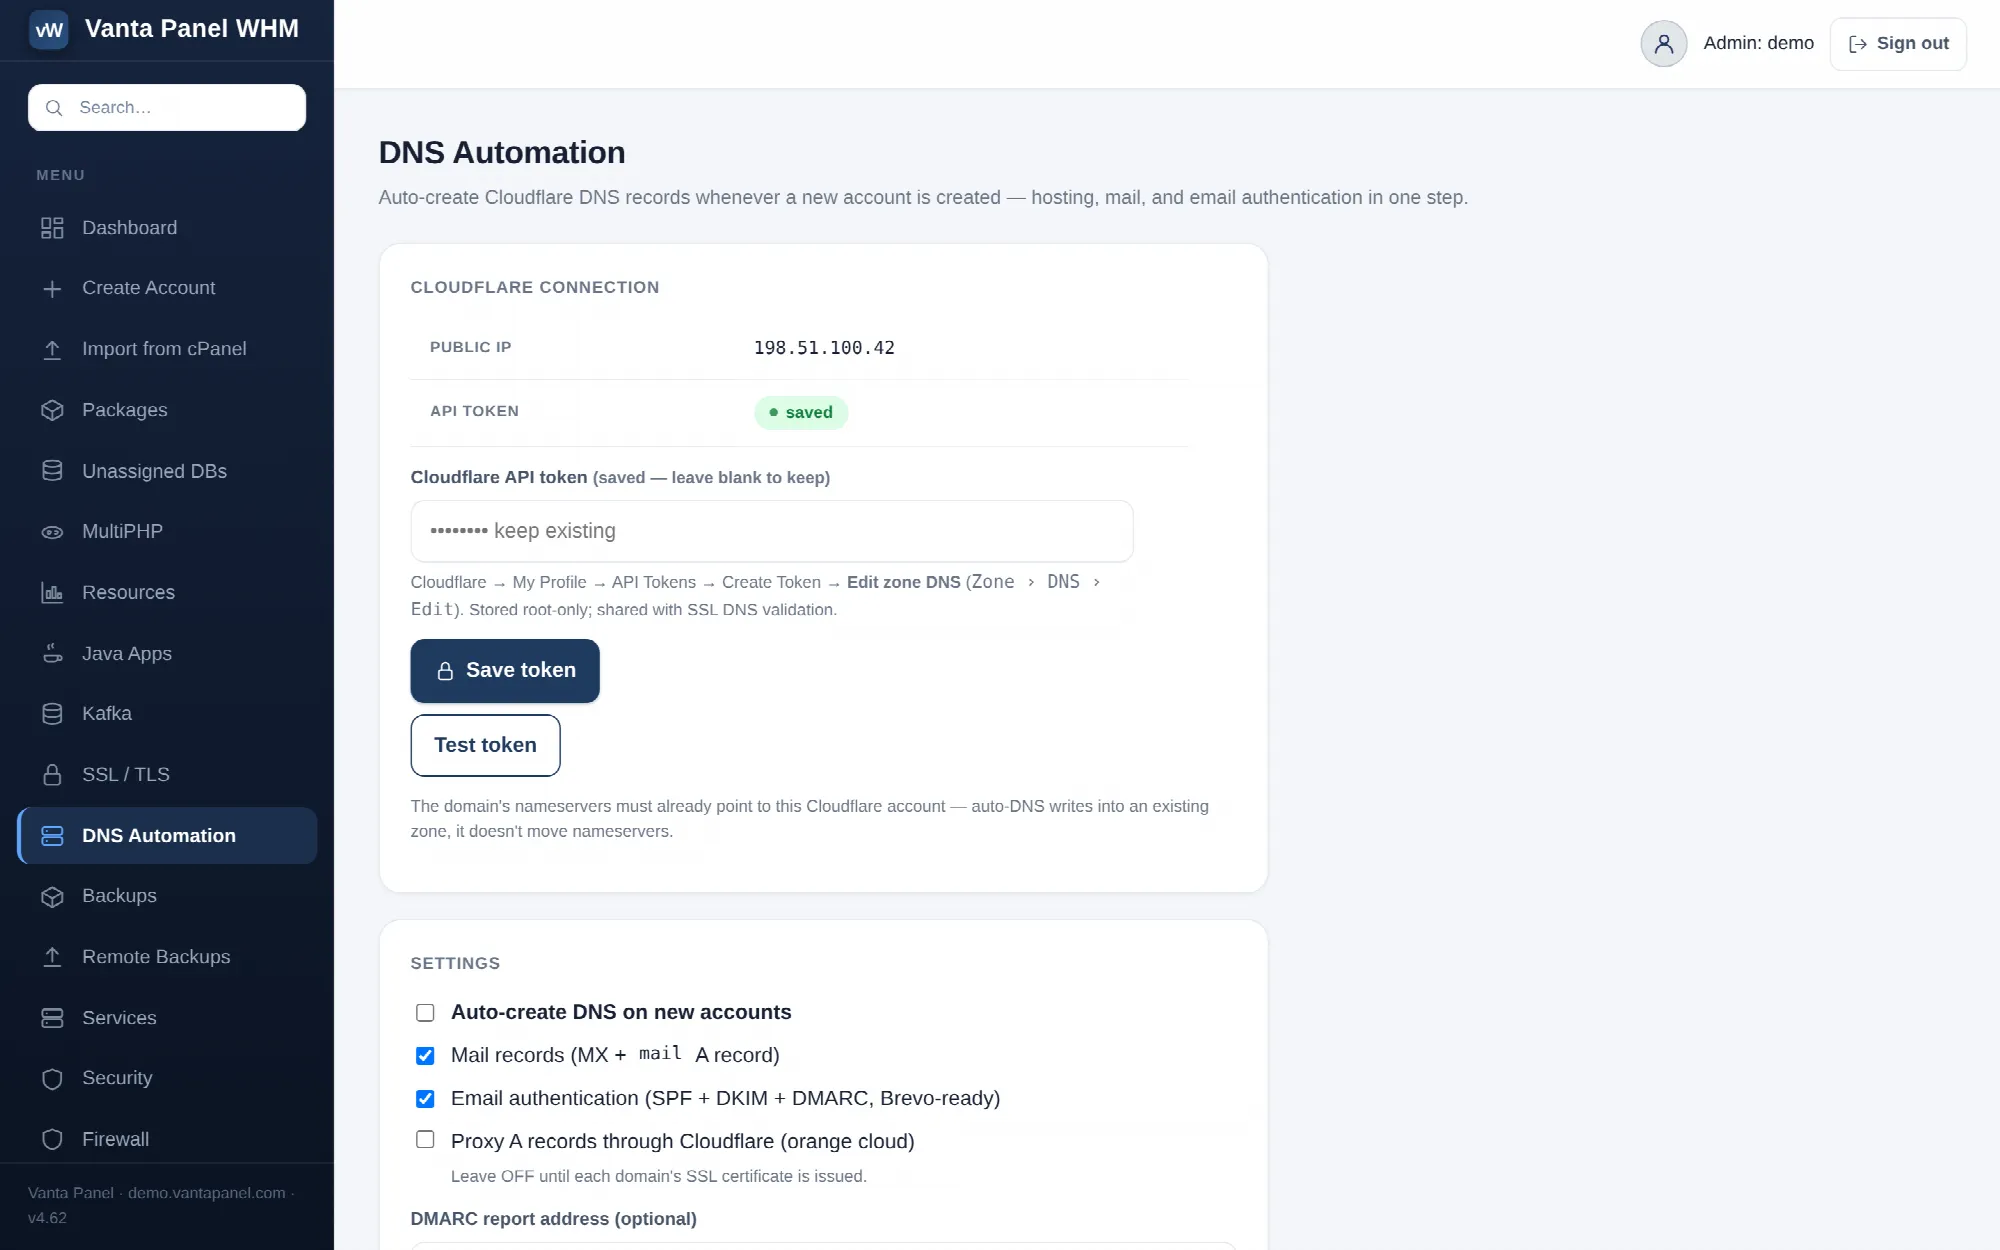 Cloudflare DNS Automation in vWHM.
DNS Automation (vWHM → DNS Automation) creates a domain's Cloudflare DNS records automatically whenever you create a hosting account, so a new site has working web and mail DNS without anyone typing records by hand.
It is one of the two DNS paths Vanta Panel offers. This one writes into Cloudflare; the other runs authoritative DNS on the server itself and is covered in Private Nameservers. They coexist — use Cloudflare for the domains you keep there, and your own nameservers for the rest.
Connecting Cloudflare
The top card shows the server's detected public IP and whether an API token is saved.
Create the token at Cloudflare → My Profile → API Tokens → Create Token → Edit zone DNS, which gives it Zone › DNS › Edit. Paste it in and save. It is stored root-only on the server and is the same token used by the Zone Editor and by DNS validation in SSL / TLS — set it in either place and all three work.
Test token verifies it without creating anything. The field is write-only — it never shows the stored token back to you, and saving it blank is rejected rather than clearing it, so an existing token cannot be wiped by accident.
The zone must already exist on that Cloudflare account, which means the domain's nameservers already point at Cloudflare. Automation writes records into an existing zone; it does not move nameservers and it does not sign a domain up to Cloudflare.
Settings
- Auto-create DNS on new accounts — the master switch. With it off, nothing happens automatically and the page becomes a manual provisioning tool.
- Mail records — adds the
MXrecord and themailA record. - Email authentication — pairs the records with Brevo. SPF and DMARC are written on every run whether or not this is ticked; ticking it adds
include:spf.brevo.comto the SPF record and, when a Brevo API key is saved, pulls in Brevo's DKIM records (brevo1._domainkey,brevo2._domainkey). - Proxy A records through Cloudflare — creates the
Arecords orange-clouded. Leave this off until each domain's certificate has been issued: a proxied record breaks HTTP validation, so the certificate cannot be obtained and the site ends up in a redirect loop. - DMARC report address — optional address to receive aggregate DMARC reports.
- Brevo API key — optional. With a key set, each new domain is registered in Brevo and its exact verification and DKIM records are pulled in automatically. Without one, standard SPF and DMARC records are still added.
Provisioning a domain manually
The bottom card runs the same setup for a domain that already exists — an account created before automation was switched on, or one whose records were removed.
It is idempotent: records that already exist are left exactly as they are, and only what is missing gets added. Running it twice does nothing the second time, so it is safe to use as a repair tool.
Account holders have a narrower version of this for their own domain — Set up email DNS in the Zone Editor. It writes only the mail records, not the A records for the site, and it generates a DKIM key on the server itself (published as vanta._domainkey) instead of using Brevo's.
Per-account setup from the Accounts page
vWHM → Accounts → the account → DNS & Email setup does the same job for one domain on one account, and additionally creates the Cloudflare zone if it does not exist yet. It writes the full working set: A @, A www, A mail, MX, SPF and DMARC — the mail A and MX records follow the Mail records setting above. Existing records are untouched, so it is safe to re-run.
Related
- Zone Editor — editing the records afterwards
- DNS Tools — confirming they resolve publicly
- Email — what the mail records are for