 Vanta Panel
Creating a Hosting Account
How vWHM provisions a hosting account: the form fields and their real limits, every step that runs on submit, double-submit protection, and the one-time credentials receipt.
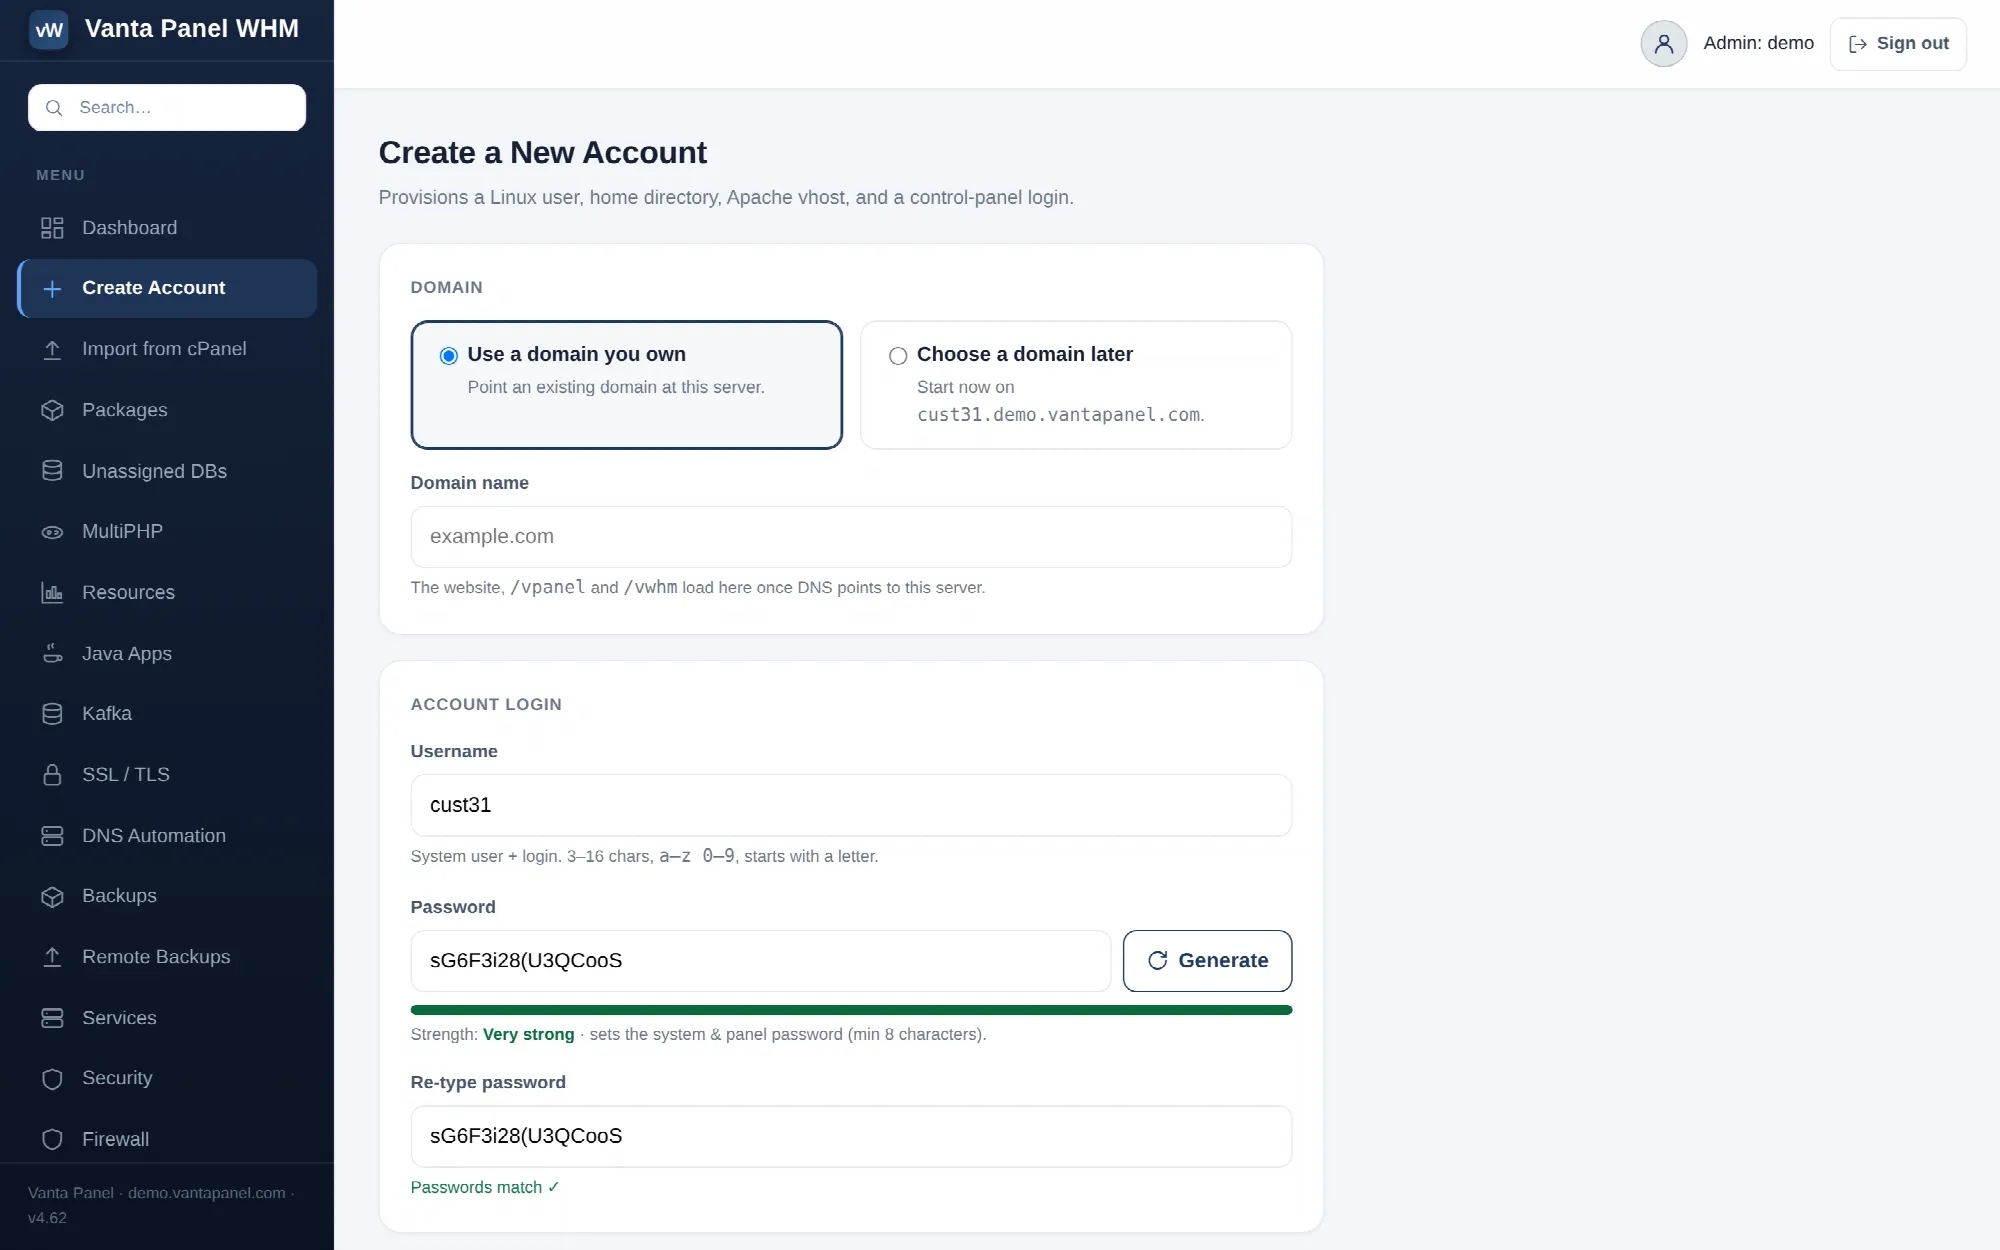 Creating a hosting account in vWHM.
Create Account (vWHM → Create Account) provisions a complete hosting account: a Linux user, a home directory, an Apache virtual host, and a vPanel login. It is one form and one button — everything else is derived from what you enter.
The form
Domain. Two modes:
- Use a domain you own — enter the domain the customer will host. Nothing is checked against DNS at this point, so you can create the account before the domain points here.
- Choose a domain later — the account is created on
<username>.<your-brand-domain>instead. This is treated as a placeholder: no authoritative DNS zone is written for it, and the shared mail certificate is not re-issued to cover it.
Username. 3 to 16 characters, lowercase a-z and 0-9, and it must start with a letter. This becomes the Linux user, the home directory name (/home/<username>), the database name prefix, and the panel login. It cannot be changed afterwards.
Password. Minimum 8 characters. The Generate button produces a 16-character password and fills both fields. The strength meter is advisory only; what the server enforces is the 8-character minimum, plus a match check if the second field has anything in it. This single password sets both the system/SSH password and the panel login.
Contact email. Optional. Validated if you enter one. It is shown in the account list and used for account notices.
Package. Optional. Leaving it as none (unlimited) means no plan limits apply. If you have no packages yet, the field says so and links to Packages.
What happens on submit
In order:
- The username, domain, password and email are validated. A username or domain already present in the panel is rejected rather than duplicated.
- The license ceiling is checked against the current account count. On the free tier that means the second account is refused with a message telling you to upgrade — see Activating your license.
- The privileged worker creates the Linux user with
/bin/bashas its shell, the home directory at/home/<username>, a document root at/home/<username>/public_htmlcontaining a placeholder page, and the Apache vhost. Apache's config is tested before it is reloaded. If setting the password, writing the vhost, enabling it or the config test fails, everything already done is rolled back — including deleting the Linux user — so a failed create never leaves half an account behind. The one step outside that guarantee is the final Apache reload: if the reload itself fails you get the error, and nothing is rolled back, because by then the account and its vhost are sound. - HTTPS is enabled immediately with an automatic self-signed certificate and a
:443vhost. This step is best-effort: if it fails the plain HTTP site still works. - The account row is written with a bcrypt password hash and status
active, and its primary domain is recorded. - If a default PHP version is set under MultiPHP, it is applied to the new account — which also moves it into its own PHP-FPM pool. See PHP versions and account isolation.
- If Cloudflare DNS Automation is enabled, the domain's record set is provisioned there.
- If authoritative DNS is enabled under Server Setup and the domain is not a placeholder, a local DNS zone is written (SOA, your NS records, A for the domain and
www, MX). - The shared trusted mail certificate is re-issued in the background so it covers
mail.<domain>too. This is best-effort and never blocks account creation. account.createis written to the audit log, along with a separate entry for each DNS step that ran.
Every step after the worker call is recorded, so if DNS or the mail certificate fails you will see it in the audit log rather than losing the account.
Double-submit protection
The form carries a one-time token issued when the page was rendered. Refreshing the confirmation page or double-clicking the button reuses a consumed token, so a second account is never created. You are simply redirected back to the confirmation page.
The confirmation page
After creation you land on a receipt screen that shows, in one block you can copy:
- domain, server IP, username, the plaintext password, home root, package, contact email
- your two private nameservers (from Server Setup)
- the customer panel URL (
https://<domain>/vpanel) and a fallback URL on your own brand domain for use before DNS propagates
This is the only place the generated password is displayed. It is held in your session, so refreshing is safe, but once you navigate away it is gone — reset it from the account's management screen if you lose it.
The same screen gives the DNS instructions for the domain in two forms, both downloadable:
- Cloudflare import file — a zone file with the two A records, ready to import.
- Plain DNS instructions — the same records as text for any DNS provider.
If authoritative DNS is enabled on this server, the page leads with the nameserver option instead: point the domain's nameservers at yours and this server serves the whole zone.
After creation
HTTPS works immediately with a self-signed certificate, which means the site loads over https:// as soon as DNS points here, and it serves the real site rather than Apache's default page behind Cloudflare in Full mode. Do not use Cloudflare's Flexible mode — it causes redirect loops. For a padlock direct to the server, install a trusted certificate from SSL / TLS or from the account's management screen.
Open the new account's management screen to set a package, change PHP, enable SSH, Java, Kafka or Redis, or reset the password. See Managing a hosting account.